Small Space Hugelkultur Using Cardboard And Branches: Easy Raised Bed Guide
Reuse Clean Yard Materials For Your Next Compact Bed
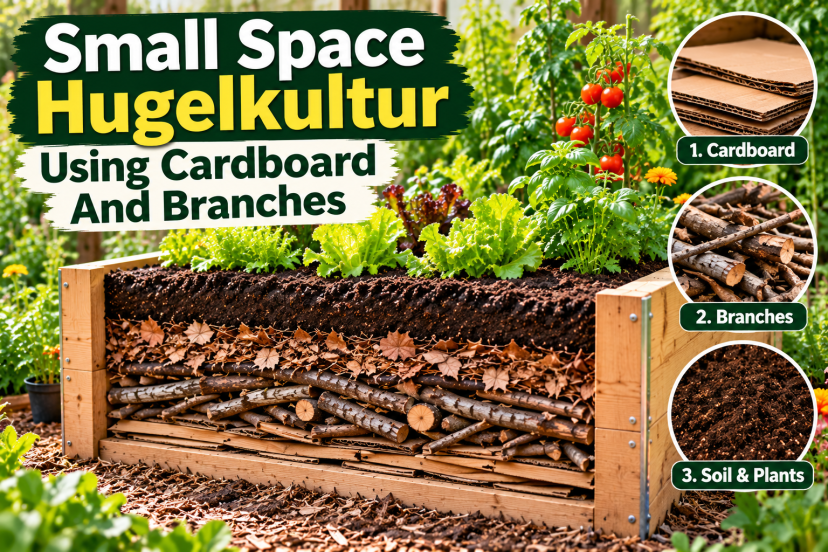
Small space hugelkultur using cardboard and branches is a practical way to reuse clean yard materials when building a compact raised garden bed. Place plain cardboard over existing vegetation, arrange a modest layer of untreated branches above it, and finish with enough quality planting soil for your vegetables.
This approach combines cardboard sheet mulching with a scaled-down version of traditional hugelkultur. It can be useful for homeowners working with small suburban yards, narrow garden spaces, and 4×4 raised beds.
However, cardboard and branches should not replace the soil your plants need. Thick woody layers can reduce rooting depth, temporarily affect nitrogen availability, and cause settling as organic materials decompose.
Quick Answer – How To Build Small Space Hugelkultur With Cardboard And Branches
For an open-bottom, 4×4 raised bed approximately 18 inches deep, start with one overlapping layer of plain cardboard directly on the ground. Add a shallow layer of small untreated branches, fill large gaps with suitable organic material, and cover everything with approximately 12 inches or more of quality growing soil.
The cardboard helps suppress existing weeds while gradually decomposing. The branches reuse yard waste and contribute organic matter over time.
Best starting approach: Use cardboard as a temporary weed barrier, keep the woody layer shallow, and prioritize a deep, well-draining planting zone.
Small Space Hugelkultur Using Cardboard And Branches – Layering Guide
The following is an illustrative layout for a 4×4 raised bed, not a scientifically established hugelkultur formula.
| Layer | Material | Suggested Depth |
|---|---|---|
| Ground level | Plain overlapping cardboard | 1 layer |
| Bottom fill | Small untreated branches | 2–3 inches |
| Gap filling | Shredded leaves and fine twigs | Up to 1 inch |
| Growing layer | Quality soil and finished compost blend | 14–15 inches |
| Surface | Optional organic mulch | 1–2 inches |
The upper mulch layer is optional and may extend above the nominal soil-fill height if the bed has sufficient headspace.

For a 4×4 bed, every inch of depth equals approximately 1.33 cubic feet of volume. A 14-inch planting layer therefore requires about 18.7 cubic feet of growing mix before accounting for settling and actual interior dimensions.
The cardboard is placed on the native ground, not between the branches and growing soil. This layout is intended for an open-bottom bed on suitable soil.
Materials And Tools You Need
Project Checklist
0 of 8 gathered
Most of the lower-layer materials may already be available after routine pruning or yard cleanup.
Avoid buying large quantities of branches specifically to fill a small bed. The main potential cost savings come from reusing suitable materials already on hand.
Why Combine Cardboard And Branches In A Raised Bed?
Cardboard Helps Suppress Existing Weeds
Plain cardboard blocks light from reaching the vegetation beneath it.
This can weaken or kill many existing weeds, particularly annual species, while allowing gardeners to avoid extensive digging.
Cardboard is not a permanent weed barrier. Persistent perennial weeds may grow around its edges or through openings, and cardboard can temporarily affect air and water movement until it breaks down.
For this reason, avoid stacking numerous thick cardboard layers beneath a vegetable bed.

Branches Reuse Organic Yard Waste
Small branches contain carbon-rich organic matter that gradually decomposes through microbial and fungal activity.
Using clean pruning debris can reduce the amount of yard waste requiring disposal.
However, decomposition is not automatically beneficial in every situation. Woody material occupies growing space and may influence nitrogen availability, drainage, and soil settling.
The Method Fits Compact Gardens
A traditional hugelkultur mound may require a large area and substantial woody material.
A micro hugelkultur bed uses a much smaller quantity.
This can make experimentation easier in suburban gardens where available space is limited, although conventional raised-bed soil remains a simpler and more predictable alternative.
How To Build Small Space Hugelkultur Using Cardboard And Branches
Step 1 – Choose A Suitable Location
Materials needed: Raised-bed frame, measuring tape, garden fork.
Choose a level location with sufficient sunlight for your intended crops. Many fruiting vegetables, including tomatoes and peppers, perform best with at least 6–8 hours of direct sunlight.
A 4×4 bed is a convenient size because gardeners can reach the center from either side without stepping on the soil.
Before building:
-
Remove trash, stones, and unwanted materials.
-
Cut existing grass or annual weeds close to ground level.
-
Remove aggressive perennial weeds and their underground structures where practical.
-
Check whether the underlying soil drains adequately.
-
Position the raised-bed frame securely.
Important: If the bed sits on concrete or another impermeable surface, cardboard beneath it will not serve the same weed-suppression purpose. Use a suitable growing medium and provide adequate drainage instead.
Step 2 – Lay Down Plain Cardboard
Materials needed: Plain cardboard, hose, scissors or utility knife.

Remove plastic tape, shipping labels, staples, and other non-paper materials.
Lay a single layer of plain corrugated cardboard over the existing vegetation, overlapping adjoining pieces by approximately 4–6 inches.
Wet the cardboard thoroughly so it lies flat and begins absorbing moisture.
University of Maryland Extension includes cardboard smothering as one method for converting lawns into raised-bed growing areas. Oregon State University Extension also advises using plain, non-glossy cardboard and avoiding excessively thick layers.
When to skip cardboard: If the ground is already weed-free, or soil aeration and drainage are concerns, there may be little reason to add it.
Step 3 – Arrange Small Untreated Branches
Materials needed: Small branches, hand pruners, gloves.
Place a shallow layer of clean, untreated branches above the cardboard.
For an 18-inch bed, approximately 2–3 inches of loosely arranged branches is a conservative experimental starting point.
Use smaller pieces rather than large logs. Trim branches that extend above the intended lower layer.
Avoid tightly packing the branches into a solid barrier.
Why this matters: The wood occupies space that could otherwise support plant roots. Keeping the layer modest reduces the amount of growing medium displaced.
Step 4 – Fill Large Gaps With Organic Material
Materials needed: Shredded leaves, small twigs, optional finished compost.
Add a modest amount of shredded leaves and small twigs around the branches to reduce large cavities.
Avoid creating a thick, compacted mat of leaves.
Lightly moisten dry material.
If the branches are tightly arranged, skip additional debris rather than forcing more organic material into the bed.

Wood and leaves will decompose at different rates, so some settling should be expected.
Step 5 – Fill With Quality Planting Soil
Materials needed: Raised-bed growing mix, finished compost, rake.

Cover the branches with a substantial layer of growing medium.
For the example 18-inch bed, approximately 14 inches of growing soil provides a generous planting zone.
Use a soil mixture suited to raised-bed vegetables. University of Maryland Extension describes combinations of compost and soilless growing mix, with topsoil included in suitable proportions for deeper beds.
Gently firm the soil to remove large air pockets without heavily compacting it.
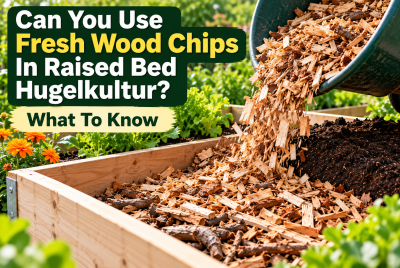
Avoid: Using pure compost as the entire planting medium or mixing large quantities of fresh wood chips into the root zone.
Step 6 – Water And Check The Soil Level
Water the bed gradually until the growing medium is evenly moist.
Check whether the soil sinks into gaps between the branches.
Add more planting mix if necessary.
Do not assume that buried wood will automatically reduce watering requirements. The moisture available to roots depends on soil texture, weather, drainage, and the amount of water applied.
Step 7 – Plant And Apply Surface Mulch
Choose vegetables appropriate for the growing depth and season.
Leaf lettuce, radishes, bush beans, and many culinary herbs can be practical options for small beds.
Follow crop-specific spacing and planting-depth recommendations.

Apply an appropriate layer of organic mulch around established plants, keeping it away from stems.
Surface mulch can help moderate soil temperature and reduce evaporation without taking up valuable root-zone space.
Is Cardboard Safe For Vegetable Garden Soil?
Plain cardboard is sometimes used for sheet mulching, but it has limitations.
The main concern is not simply whether cardboard decomposes. It is how a continuous sheet affects the movement of water and air while it remains intact.
Potential Benefits
-
Weed suppression: Blocks light from reaching many existing weeds.
-
Material reuse: Gives clean cardboard another use before decomposition.
-
Reduced digging: May help gardeners establish beds without removing all existing turf.
Potential Drawbacks
-
Water movement: Thick cardboard can temporarily restrict infiltration.
-
Air exchange: Continuous layers may reduce oxygen movement into underlying soil.
-
Variable decomposition: Breakdown depends on moisture, temperature, and soil activity.
-
Persistent weeds: Aggressive perennial species may grow through openings or around edges.
University of California’s Integrated Pest Management program specifically identifies restricted water and air movement as potential drawbacks of cardboard sheet mulching.
Practical recommendation: Use cardboard only when weed suppression is needed. Do not treat it as a required component of every raised-bed project.
Will Buried Branches Affect Nitrogen Availability?
Yes, they can. Wood contains substantial carbon, and microorganisms decomposing it need nitrogen.
When woody material is incorporated into soil, microbial activity may temporarily immobilize nitrogen that plants would otherwise use.
The effect depends on how much wood is present, how finely divided it is, and how closely it contacts the root zone.
Colorado State University Extension explains that fresh wood products can immobilize nitrogen, particularly when incorporated into growing soil.

How To Reduce The Risk
-
Keep branches below roots: Preserve a substantial layer of planting soil.
-
Prefer aged wood: Partially decomposed material may be easier to incorporate.
-
Use finished compost: Maintain a suitable nutrient supply in the growing medium.
-
Monitor plant growth: Watch for yellowing or stunting.
-
Test before fertilizing: Nutrient problems can resemble drainage or watering problems.
Do not automatically apply extra nitrogen simply because branches are present.
5 Common Mistakes To Avoid
1. Using Too Many Cardboard Layers
Stacking multiple thick layers can restrict water and air movement.
Better approach: Use one overlapping layer only when weed suppression is necessary, and thoroughly moisten it.
2. Filling Most Of The Bed With Branches
A large woody layer leaves less space for healthy roots.
Better approach: Keep the woody section modest, particularly in beds less than 18 inches deep.
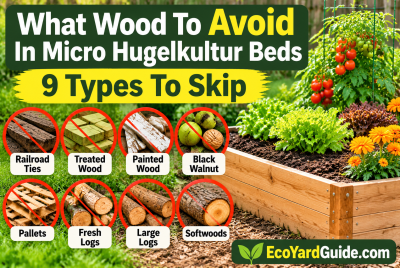
3. Using Unknown Or Treated Wood
Construction scraps, painted lumber, and contaminated branches may introduce unwanted substances into food-growing soil.
Better approach: Choose clean, untreated branches from a known source.
For additional guidance, see the related article What Wood To Avoid In Micro Hugelkultur Beds: 9 Types To Skip.
4. Assuming Cardboard Stops Every Weed
Cardboard can suppress many annual weeds, but persistent perennial species may survive.
Better approach: Remove difficult perennial weeds before building and monitor the bed edges afterward.
5. Ignoring Soil Settling
As branches decompose, the growing medium can sink into the lower layer.
Better approach: Inspect the bed regularly and replenish soil between crops when necessary.
Better Alternatives For Small Raised Beds
A cardboard-and-branch bed is not the only affordable option.
| Method | Best Use | Main Limitation |
|---|---|---|
| Cardboard and shallow branches | Reusing clean yard materials | Potential settling and reduced rooting volume |
| Soil and finished compost | Predictable vegetable growing | May require more purchased material |
| Cardboard weed suppression only | Converting weedy ground | Temporary water and air restrictions |
| Surface wood-chip mulch | Moisture conservation and weed management | Requires occasional replenishment |
| Composting branches separately | Recycling woody waste | Requires time and space |
For many small vegetable gardens, filling the bed with appropriate soil and compost is the most straightforward choice.
Washington State University Extension notes that scientific evidence supporting hugelkultur’s claimed benefits remains limited and recommends surface uses of woody debris as more established alternatives.
How To Maintain The Bed During The First Year
First Two Weeks
Check moisture several inches below the soil surface.
Look for uneven settling, especially after heavy watering or rain.
Add planting mix if large depressions appear.
First Growing Season
Monitor vegetable growth, soil moisture, and drainage.
Do not rely on the appearance of the cardboard or woody layers to determine whether plants need water.
If growth slows, consider nutrient availability, root health, temperature, and watering conditions.
After Harvest
Inspect the bed for settling.
Add suitable soil or finished compost as needed.
Avoid digging large quantities of partially decomposed wood into the active root zone.
Over time, buried branches will lose volume, although decomposition rates vary substantially.
Frequently Asked Questions
Can I Put Cardboard Directly Under A Raised Garden Bed?
Yes, plain cardboard can be used over existing grass or weeds before filling an open-bottom raised bed. Remove tape, labels, and staples, and wet the cardboard thoroughly. However, it can temporarily restrict water and air movement, so it is unnecessary when the underlying soil is already weed-free.
Can I Use Fresh Branches Instead Of Old Wood?
Fresh, untreated branches can be used cautiously, but partially decomposed wood may be more convenient. Fresh woody material can contribute to temporary nitrogen immobilization, particularly when mixed into planting soil. Keep branches below a substantial growing layer and avoid filling most of a shallow bed with fresh wood.
How Deep Should A Small Hugelkultur Raised Bed Be?
An 18–24-inch bed offers more flexibility than a shallow 12-inch bed when experimenting with buried branches. Preserve enough suitable soil for the intended crops. If the bed is only 12 inches deep, using quality growing medium throughout its depth is usually a more predictable approach.
Final Thoughts
Small space hugelkultur using cardboard and branches can be an affordable way to experiment with recycled organic materials in a compact garden.
The most important decision is how much growing space you preserve for plant roots.
Use cardboard selectively for weed suppression, choose clean and untreated branches, and avoid thick buried layers that may interfere with water movement or cause excessive settling.
For a small vegetable bed, healthy growing soil should always take priority over woody filler.
If you want to experiment, start with a shallow branch layer in a deeper bed and monitor the results throughout the growing season.
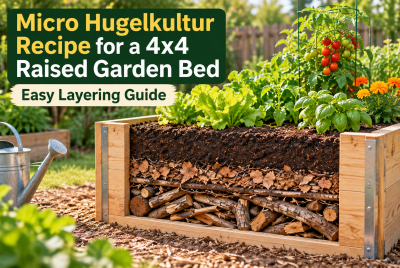
For additional layering ideas, see Micro Hugelkultur Recipe For A 4×4 Raised Garden Bed: Easy Layering Guide.
Research And Further Reading
Explore more:
- Micro-Hugelkultur For Raised Beds — Pillar Hub
- How To Layer Micro Hugelkultur In Raised Beds
- Best Logs For Hugelkultur Raised Bed Foundation
- Filling A 24 Inch Deep Vego Bed With Hugelkultur
- Micro Hugelkultur Recipe For A 4×4 Raised Garden Bed
- Can You Use Fresh Wood Chips In Raised Bed Hugelkultur?
- What Wood To Avoid In Micro Hugelkultur Beds