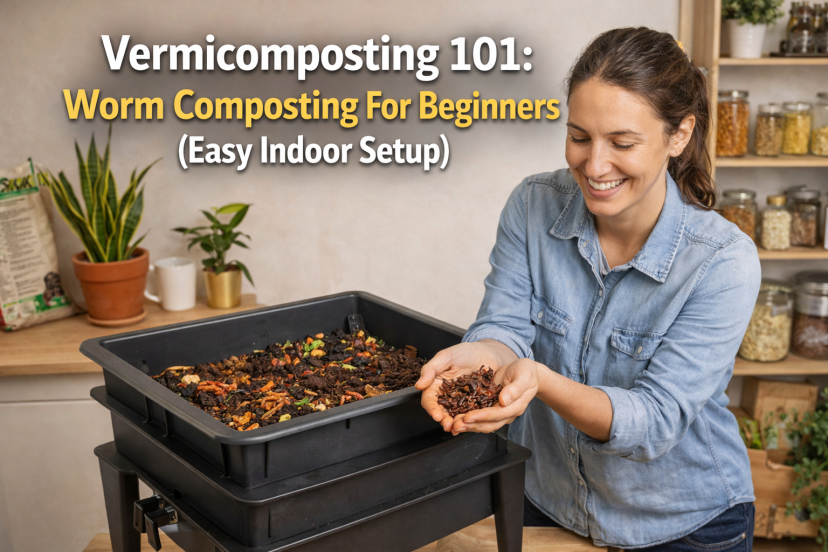
Vermicomposting 101: Worm Composting For Beginners (Easy Indoor Setup)
⭐ Turn Kitchen Scraps Into Black Gold
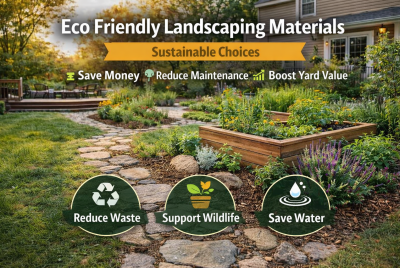
If you want to save money, reduce household waste, and live more sustainably, composting is one of the smartest habits you can build. But what if you don’t have a backyard, live in an apartment, or simply don’t want an outdoor compost pile?
That’s where worm composting for beginners comes in.
Vermicomposting uses worms to break down food scraps into rich, nutrient-dense compost—right inside your home. With the right setup, it’s clean, odor-free, and surprisingly easy. Many eco-conscious U.S. households now use indoor worm bins to cut landfill waste while producing some of the best fertilizer available.
This beginner-friendly guide covers easy setup, daily care, and troubleshooting, so you can start vermicomposting with confidence.
🌎 What Is Worm Composting?
Worm composting—also called vermicomposting—is a natural process where specific worms eat organic waste and convert it into worm castings, a powerful soil amendment.
🌱 Why Vermicompost Is Special
-
Richer in nutrients than regular compost
-
Improves soil structure and moisture retention
-
Boosts beneficial microbes
Worm castings are often called “black gold” because even small amounts can dramatically improve plant health.
🌿 Why Worm Composting For Beginners Makes Sense
Traditional composting can feel intimidating. Worm composting is often easier for beginners.
💰 Financial Benefits
-
Reduces trash pickup needs
-
Cuts spending on fertilizer
-
Stretches grocery dollars by reusing scraps
🌱 Environmental Benefits
-
Keeps food waste out of landfills
-
Reduces methane emissions
-
Supports closed-loop sustainability
🏠 Lifestyle Benefits
-
Works indoors year-round
-
No yard required
-
Minimal smell when done correctly
For many households, worm composting for beginners is the most practical entry into sustainable living.
🐛 The Best Worms For Vermicomposting
Not all worms are suitable for indoor composting.
🐛 Recommended Composting Worms
-
Red wigglers (Eisenia fetida)
-
European nightcrawlers (Eisenia hortensis)
❌ Avoid earthworms from your yard—they don’t thrive in bins.
🌱 How Many Worms Do You Need?
A good rule:
-
1 pound of worms per 1–2 pounds of food scraps per week
Most beginners start with 1 pound of red wigglers, which is perfect for a standard worm bin setup.
🔧 Worm Bin Setup: Step-By-Step For Beginners
Setting up your bin correctly prevents most problems.
🧰 What You’ll Need
-
Plastic or wooden bin with lid
-
Air holes (⅛–¼ inch)
-
Bedding material
-
Composting worms
🪵 Bedding Materials (Eco-Friendly Options)
-
Shredded cardboard
-
Newspaper (Black ink only)
-
Coconut coir
-
Dried leaves
Bedding should feel like a wrung-out sponge—moist, not dripping.
🔧 Simple Worm Bin Setup Steps
-
Drill air holes in the lid and sides
-
Add moist bedding (Fill bin halfway)
-
Gently add worms
-
Bury small amounts of food
-
Close the lid and place the bin in a stable indoor spot
Ideal locations include:
-
Laundry rooms
-
Closets
-
Garages (Temperature-controlled)
🌡️ Ideal Conditions For Worm Composting
Worms are living creatures and need stable conditions.
🌱 Best Temperature Range
-
55°F–77°F (13°C–25°C)
Most U.S. homes naturally stay within this range.
💧 Moisture Balance
-
Too dry = Worms slow down
-
Too wet = Odor and mold
Add dry bedding if things get soggy.
🥕 What To Feed Your Worms (And What To Avoid)
Proper feeding is essential for successful worm composting for beginners.
✅ Best Foods For Worm Bins
-
Fruit and vegetable scraps
-
Coffee grounds (With filters)
-
Crushed eggshells
-
Tea bags (Plastic-free)
❌ Foods To Avoid
-
Meat and fish
-
Dairy
-
Oily foods
-
Salty or spicy leftovers
🌱 Feeding Tips
-
Chop scraps into small pieces
-
Bury food under bedding
-
Rotate feeding locations
Start slow. Overfeeding is the #1 beginner mistake.
🌿 Understanding Worm Castings
Worm castings are the finished compost produced by worms.
🌱 Why Castings Are So Powerful
-
Slow-release nutrients
-
Beneficial microbes
-
Improves root growth
Even a small amount mixed into potting soil or garden beds makes a big difference.
🌼 How To Harvest Vermicompost
Harvesting doesn’t have to be complicated.
🔧 Beginner-Friendly Harvest Methods
🌱 Light Method
-
Push castings to one side
-
Add fresh bedding and food to the other
-
Worms migrate naturally
🔧 Scoop Method
-
Remove finished castings by hand
-
Return visible worms to the bin
Harvest every 2–4 months for best results.
🌿 Using Vermicompost In Your Yard And Home
🌱 Indoor Plants
-
Mix castings into potting soil
-
Sprinkle on the soil surface
🌼 Garden Beds
-
Add to planting holes
-
Top-dress around plants
💧 Worm Tea (Optional)
-
Steep castings in water
-
Use as a soil drench
This makes worm composting for beginners incredibly rewarding—you see results fast.
🔧 Common Worm Composting Problems (And Fixes)
❌ Bad Smell
-
Cause: Overfeeding or excess moisture
-
Fix: Add dry bedding, reduce food
🐛 Worms Crawling Up Sides
-
Cause: Bin too wet or acidic
-
Fix: Add cardboard, check food balance
🍄 Mold Or Fruit Flies
-
Cause: Exposed food
-
Fix: Bury scraps deeper, freeze food before adding
Most problems are easy to fix once you know the cause.
🌎 U.S.-Specific Composting Considerations
🇺🇸 Local Regulations
-
Indoor composting is legal nationwide
-
Check HOA rules for storage locations
🌱 Sustainability Trends
-
Many U.S. cities promote food waste reduction
-
Composting supports zero-waste goals
Worm bins are especially popular in apartments and urban homes.
☀️ Eco Benefits Beyond Composting
Vermicomposting supports broader green living goals:
-
Reduces landfill pressure
-
Lowers carbon footprint
-
Supports organic gardening
It pairs well with:
-
Rainwater collection
-
Native plant gardening
-
Eco-friendly lawn alternatives
🌱 Worm Composting Troubleshooting Cheat Sheet
Use this quick-reference guide to diagnose and fix the most common issues with worm composting for beginners—fast, clean, and stress-free.
🛑 Bad Odor (Smells Like Rotting Food)
Likely Causes
-
Overfeeding kitchen scraps
-
Excess moisture in the bin
-
Poor airflow
Quick Fixes
-
Remove uneaten food
-
Add dry bedding (shredded cardboard or paper)
-
Fluff bedding to improve airflow
Prevention Tip
-
Feed smaller amounts and wait until food is mostly gone before adding more
🐛 Worms Crawling Up Sides Or Escaping
Likely Causes
-
The bin is too wet or acidic
-
Sudden temperature changes
-
Fresh food placed on top
Quick Fixes
-
Add crushed eggshells to balance acidity
-
Mix in dry bedding
-
Bury food deeper
Prevention Tip
-
Keep moisture like a wrung-out sponge
🍄 Mold Growing On Food Or Bedding
Likely Causes
-
Food exposed to air
-
Too much food at once
-
Poor circulation
Quick Fixes
-
Remove moldy food
-
Bury scraps deeper
-
Add more bedding
Prevention Tip
-
Chop food smaller and rotate feeding locations
🪰 Fruit Flies Or Gnats
Likely Causes
-
Exposed fruit scraps
-
Warm indoor temperatures
Quick Fixes
-
Freeze scraps before feeding
-
Cover food completely with bedding
-
Use a breathable fabric under the lid
Prevention Tip
-
Avoid leaving food uncovered in the bin
💧 Bin Too Wet Or Leaking Liquid
Likely Causes
-
Too many watery foods
-
Poor drainage
-
Insufficient bedding
Quick Fixes
-
Add dry bedding immediately
-
Reduce fruit intake
-
Drain excess liquid if possible
Prevention Tip
-
Balance food scraps with carbon-rich bedding
🌬️ Bin Too Dry
Likely Causes
-
Too much dry bedding
-
Low-humidity environment
Quick Fixes
-
Lightly mist bedding with water
-
Add moisture-rich food like melon rinds
Prevention Tip
-
Check moisture weekly
🐌 Worms Seem Slow Or Inactive
Likely Causes
-
Cold temperatures
-
Lack of food
-
Poor bedding quality
Quick Fixes
-
Move bin to warmer area (55–77°F)
-
Add small amounts of food
-
Refresh bedding
Prevention Tip
-
Keep the bin indoors during winter
🌱 Food Not Breaking Down
Likely Causes
-
Large food pieces
-
Too few worms
-
Low microbial activity
Quick Fixes
-
Chop food finely
-
Add crushed eggshells
-
Increase worm population if needed
Prevention Tip
-
Feed soft foods and avoid overloading
🪱 Worms Dying In The Bin
Likely Causes
-
Extreme temperatures
-
Toxic foods (citrus overload, salty foods)
-
Chemical contamination
Quick Fixes
-
Remove harmful food
-
Replace bedding
-
Adjust the temperature immediately
Prevention Tip
-
Avoid spicy, salty, or processed foods
🌿 Castings Look Wet Or Muddy
Likely Causes
-
Excess moisture
-
Insufficient airflow
Quick Fixes
-
Mix in dry bedding
-
Increase ventilation
Prevention Tip
-
Harvest castings regularly
✅ Weekly Bin Health Checklist
-
Check the moisture level
-
Smell the bin (should smell earthy)
-
Bury food scraps
-
Add bedding if needed
-
Observe worm activity
🧑🔧 When To Consult A Professional
While worm composting is DIY-friendly, consider expert help if:
-
You plan large-scale composting
-
Pests persist despite adjustments
-
You’re integrating compost systems into landscaping or solar installations
Extension services and eco-contractors can offer region-specific guidance.
❓ FAQs About Worm Composting For Beginners
🌱 Is Worm Composting Safe Indoors?
Yes. When managed correctly, bins are clean and odor-free.
🐛 Do Worm Bins Smell Bad?
No. A healthy bin smells like soil, not garbage.
🥕 How Long Does Vermicomposting Take?
Most bins produce usable castings in 2–4 months.
🏠 Can I Vermicompost In An Apartment?
Absolutely. Worm composting for beginners is ideal for apartments.
🌡️ What If My Home Gets Cold?
Move the bin indoors or insulate it during winter.
🌼 Can I Use Worm Castings On All Plants?
Yes. They’re gentle and safe for vegetables, flowers, and houseplants.
🔧 How Much Time Does Worm Composting Take?
About 5–10 minutes per week once established.
🌿 Conclusion: Start Small, Make A Big Impact
Worm composting for beginners proves that sustainable living doesn’t have to be complicated. With a simple bin, the right worms, and a little care, you can turn everyday food scraps into one of the best soil amendments available.
Each banana peel and coffee ground you divert from the trash helps your plants, your wallet, and the planet. Start small, stay consistent, and let your worms do the hard work.
⚠️ Disclaimer
DIY composting involves organic materials and living organisms. Follow basic hygiene, local guidelines, and safety practices when handling compost and food waste.
 Explore more:
- How To Improve Clay Soil Naturally
- Eco Yard Mistakes Most Homeowners Make
- Rainwater Harvesting For Beginners