DIY Rain Barrel: Collect and Reuse Rainwater Easily

🌿 Introduction: Turn Rainwater Into a Free Resource
Every time it rains, gallons of clean, usable water pour off your roof — straight into storm drains. But what if you could capture that water and use it to water your plants, wash your car, or even clean your patio? 💧 A DIY rain barrel lets you do exactly that. It’s an easy, low-cost way to conserve water, reduce your utility bills, and make your yard more sustainable. Whether you live in a dry region or an area with frequent rain, setting up your own rain collection system helps both your wallet and the planet.
According to the U.S. Environmental Protection Agency (EPA), outdoor water use accounts for nearly 30% of household water consumption — and even more in arid states like Arizona, Texas, and California. By building a rain barrel, you can reduce your reliance on city water, cut waste, and create a truly eco-friendly yard. 🌎
🪣 What Is a Rain Barrel?
A rain barrel is a large container designed to collect and store rainwater that runs off your roof through gutters and downspouts. You can then use that water for:
-
Watering lawns, gardens, and flowerbeds 🌻
-
Cleaning outdoor furniture and walkways
-
Refilling birdbaths or fountains
-
Washing your car or tools
Most barrels hold between 40–80 gallons, and they can be made from recycled materials or store-bought kits. A DIY rain barrel setup can be as simple as connecting a food-grade plastic barrel to your gutter with a hose or spigot.
🌧️ Benefits of a DIY Rain Barrel
Building your own rain barrel is more than a fun weekend project — it’s an investment in your home’s sustainability. Here’s why it’s worth it:
💸 1. Save Money on Water Bills
Even a small roof can collect hundreds of gallons of water during a single rainfall. Every drop you reuse reduces your need for tap water, saving money year-round.
🌱 2. Promote a Greener Yard
Rainwater is naturally soft and free of chemicals like chlorine or fluoride, making it healthier for your plants and soil.
🌎 3. Reduce Runoff and Flooding
By capturing rainwater, you prevent excess runoff that can cause soil erosion and carry pollutants into local waterways.
♻️ 4. Support Sustainability
This simple system reduces your home’s environmental impact, aligns with eco-friendly landscaping practices, and can even boost property value.
🛠️ How to Build a DIY Rain Barrel (Step-by-Step)
You don’t need to be a plumber or handyman to build one. With basic materials and a little time, you can assemble a durable, efficient system in just a few hours.
🧰 What You’ll Need:
Tools:
-
Drill with a hole saw attachment
-
Measuring tape
-
Utility knife
-
Wrench or pliers
Materials:
-
50-gallon food-grade plastic barrel (avoid chemicals or old oil drums)
-
¾-inch spigot
-
Rubber washers and nuts
-
Teflon tape (for sealing threads)
-
Screen or mesh (to keep debris and mosquitoes out)
-
Downspout diverter or flexible hose
-
Bricks or cinder blocks for elevation
🔧 Step 1: Choose a Location
Place your barrel under a gutter downspout where rain naturally flows. Make sure it’s on a level surface and elevated with bricks or blocks so gravity can help you drain the water.
💡 Pro Tip: A raised barrel increases water pressure, making it easier to use with a hose.
🪚 Step 2: Install the Spigot
-
Drill a hole about 2–3 inches from the bottom of the barrel.
-
Wrap the spigot threads with Teflon tape to prevent leaks.
-
Insert the spigot, using washers and nuts on both sides for a tight seal.
🌧️ Step 3: Add an Overflow Hole
Drill another hole near the top of the barrel to prevent overflow during heavy rain. Attach a short hose or PVC pipe to direct extra water away from your foundation or into another barrel (for a multi-barrel system).
🪣 Step 4: Modify the Lid
Cut a large opening on the top of the barrel to fit your gutter or downspout diverter.
Cover the opening with fine mesh or screen to keep out leaves, debris, and mosquitoes. Secure it tightly with glue or bungee cords.
💦 Step 5: Connect the Downspout
Attach your downspout diverter kit or flexible hose to guide rainwater from the gutter into your barrel. Many kits are available online or at hardware stores for under $30.
✅ Step 6: Test and Use
When it rains, your barrel should begin to fill. Check for leaks and adjust your connections. Use the spigot to fill watering cans, connect a soaker hose, or refill a secondary container.
Congratulations — you’ve just built a DIY rain barrel that will pay for itself in savings and sustainability! 🌧️🌿
🌼 Safety and Maintenance Tips
Even a simple system needs occasional care to stay clean and functional.
🧽 1. Clean It Regularly
Rinse your barrel every few months to prevent algae buildup or odors. Remove and wash the mesh filter to keep out debris.
🦟 2. Keep Mosquitoes Away
Make sure your screen is secure and replace any damaged mesh. Adding a mosquito dunk (biodegradable larvicide) can help if needed.
❄️ 3. Prepare for Winter
In freezing climates, drain and disconnect your rain barrel during the winter months to prevent cracking. Store it upside down or indoors.
⚙️ 4. Use Rainwater Safely
Rainwater is best for outdoor use (gardens, lawns, or non-drinking purposes). Don’t drink it or use it for cooking unless it’s been filtered and sanitized.
🌻 Eco-Friendly Uses for Your Collected Rainwater
Wondering what to do with all the water you collect? Here are a few ideas:
-
Water your vegetable garden — plants love chlorine-free rainwater.
-
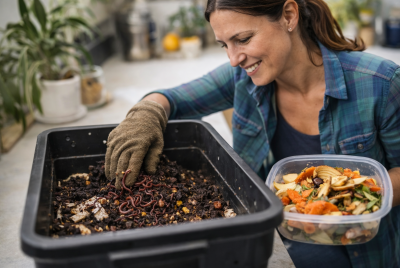
Feed your compost pile — it keeps materials moist without chemicals.
-
Clean garden tools, cars, or patios sustainably.
-
Refill birdbaths and fountains to support local wildlife.
-
Create a drip irrigation system for efficient watering.
🌎 How Much Water Can You Collect?
You might be surprised how much water your roof can gather.
Formula:
1 inch of rain on 1,000 square feet of roof = 623 gallons of water.
So if you have a 1,200-square-foot roof, a 1-inch rainfall can yield roughly 750 gallons — enough to fill ten 75-gallon barrels!
Even in drier U.S. regions, a few barrels can significantly reduce your dependency on municipal water supplies.
🧩 Creative DIY Rain Barrel Ideas
You can easily customize your rain barrel to match your home’s style and yard layout.
🎨 1. Painted Barrel Designs
Turn your rain barrel into garden art! Use weather-resistant paint to decorate it with nature themes, vines, or patterns.
🔗 2. Multi-Barrel Systems
Connect multiple barrels using hoses or PVC pipes to store more water — especially useful for large gardens or long dry seasons.
☀️ 3. Solar-Powered Pumps
Upgrade your system by adding a small solar pump to distribute water through hoses automatically.
🪴 4. Recycled Barrel Projects
Repurpose an old food-grade drum or whiskey barrel for a rustic, sustainable look.
🌿 Environmental Benefits of a DIY Rain Barrel
This simple backyard project makes a real difference in your community’s sustainability.
✅ Reduces water demand: You’ll use less treated water for non-drinking needs.
✅ Cuts stormwater runoff: Helps reduce erosion and prevent pollution in rivers and lakes.
✅ Promotes biodiversity: Provides a steady water source for pollinators and wildlife.
✅ Encourages eco education: Great for teaching kids about conservation and sustainability.
🌎 A single household rain barrel can save over 1,300 gallons of water each year!
💬 7 FAQs About DIY Rain Barrels
1. Are DIY rain barrels legal in every U.S. state?
In most states, yes — but a few (like Colorado and Nevada) have restrictions. Check your local water laws before collecting rainwater.
2. Can I drink rainwater from my rain barrel?
No. Rainwater collected from roofs can contain pollutants. Use it only for outdoor, non-potable purposes unless filtered and purified.
3. How much does it cost to build a DIY rain barrel?
A basic setup costs between $25 and $75, depending on the materials you already have.
4. Do rain barrels overflow in heavy rain?
They can! That’s why adding an overflow outlet is important to divert excess water safely away from your home.
5. Will my rain barrel attract mosquitoes?
Not if you use a tight-fitting lid and mesh screen. You can also add natural repellents like mosquito dunks.
6. How do I increase water pressure?
Elevate your barrel using cinder blocks or add a small pump to improve water flow.
7. Can I connect my rain barrel to my garden irrigation system?
Absolutely! Use a soaker hose or drip irrigation line for efficient watering directly from your barrel.
🌦️ Conclusion: Start Your Water-Saving Journey Today
Building a DIY rain barrel is one of the easiest and most rewarding eco-friendly projects you can do at home. It saves money, conserves water, and helps your garden thrive naturally.
Whether you live in a suburban neighborhood or a rural area, you’ll enjoy watching your rainwater collection system pay off — both for your yard and the planet. 🌎💧
So grab your tools, roll up your sleeves, and start building your sustainable water-saving solution today!
⚠️ Disclaimer:
This article is for informational purposes only. Always follow local regulations regarding rainwater collection and consult professionals if needed for installation or safety concerns.
 Explore more:
- Eco-Friendly Lawn Care
- 5 Energy Efficient Yard Ideas That Boost Curb Appeal
- How to Start Composting at Home